In this blog, we’ll dive into the practical steps of using scikit-learn’s Random Forest Classifier to predict customer churn on Microsoft Fabric. We’ll cover an intro to data preparation, model training, and evaluation to empower you with the tools needed for effective churn prediction. Stay tuned for a concise walkthrough that will enhance your data analytics practice.
Inspiration for this article and many of the details on how to get this working are derived from the amazing Practical Deep Learning for Coders course.
Create an ML Model
To start with, create a new ML model in the Data Science section of Microsoft Fabric
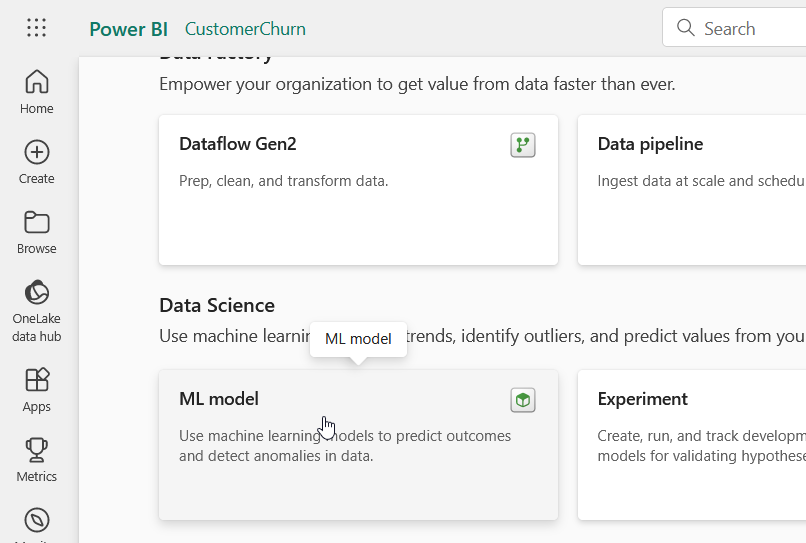
You’ll be asked to name your model, as we’ll be predicting Customer Churn, I’ve creatively named mine CustomerChurn
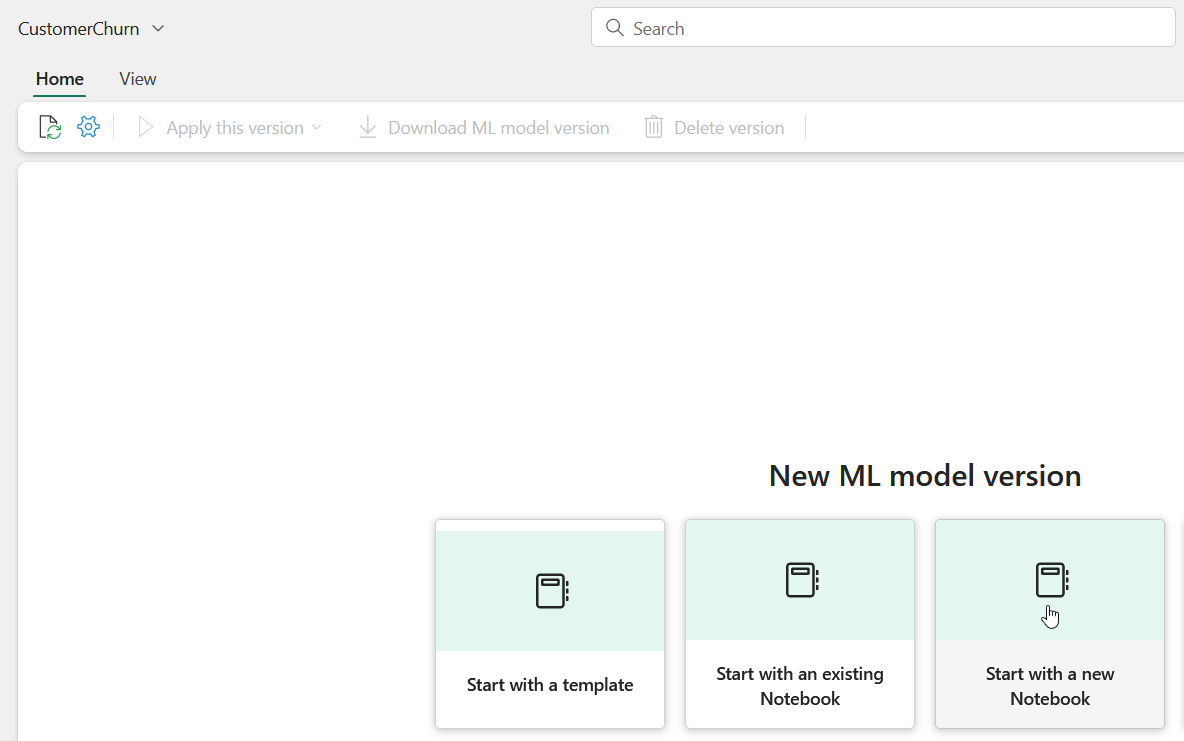
Next, click on “Start with a new Notebook”
Train your model
The following commands will download a customer churn dataset, create small training and testing datasets, train a model, and save it with mlflow. Add these to your new Notebook. Each section can be it’s own cell in your notebook.
Install requirements
%pip install -U -q datasets scikit-learn
Import MLflow
import mlflow
import mlflow.sklearn
Load a customer churn dataset from the HuggingFace Hub
from datasets import load_dataset

churn = load_dataset('scikit-learn/churn-prediction')
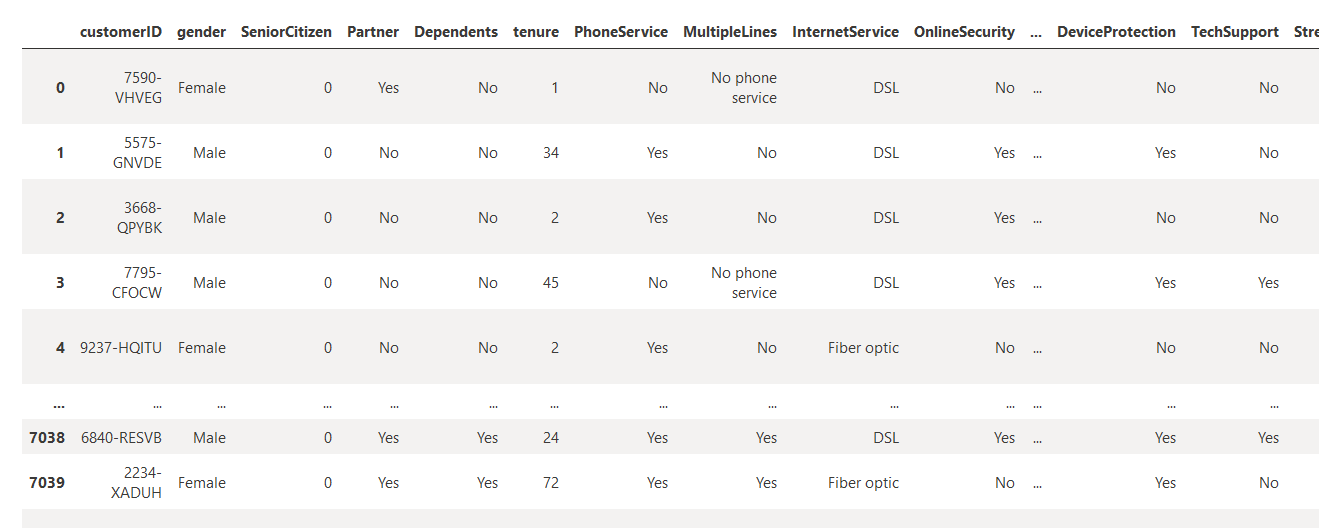
Convert the dataset to a pandas dataframe.
df = churn['train'].to_pandas()
df
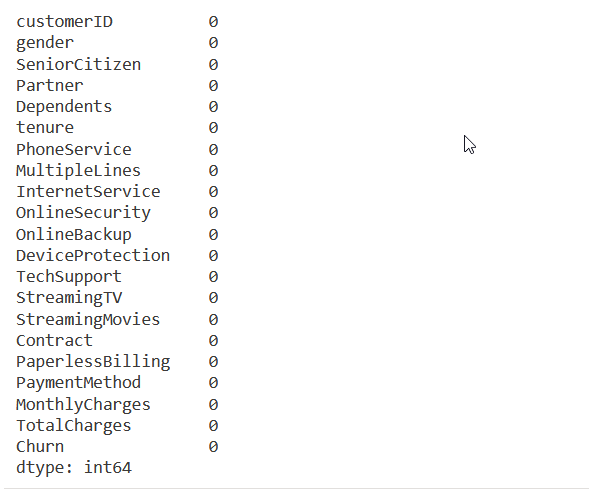
Check for any empty values - none are found in this dataset
df.isna().sum()
Check the dataframes data types
df.dtypes
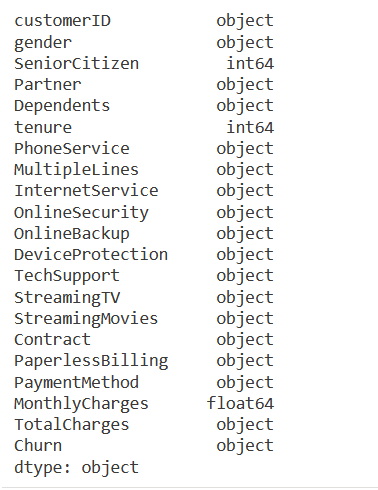
Note that TotalCharges is an object datatype, that is because it actually has some empty rows with just ‘ ‘. For the purposes of this notebook, I’ll be recalculating TotalCharges as tenure x MonthlyCharges.
df['TotalCharges'] = df.tenure * df.MonthlyCharges
Now we’ll convert SeniorCitizen to an object (as it’s actually going to be a categorical field) and convert TotalCharges to float.
df = df.astype({'SeniorCitizen': 'object'})
df = df.astype({'TotalCharges': 'float'})
df.dtypes
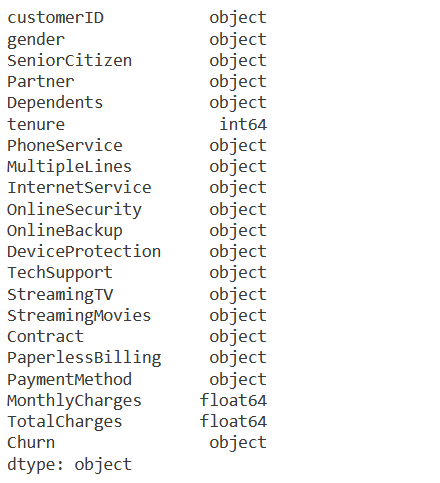
Now we’ll try to automate splitting our columns into dependent variable (what we’re trying to predict), categorical, and continuous fields. We’ll also be removing the customerID field from the training and validation data. We’re going to assume that all non-numeric variables are going to be categorical.
import pandas as pd

def cat_columns(df):
    dep = 'Churn'
    cats = [col for col in df.columns if col not in df.describe().columns]
    conts = [col for col in df.columns if col not in df[cats]]
    cats.remove(dep)
    cats.remove('customerID')
    df[cats] = df[cats].apply(lambda x: pd.Categorical(x))
    df = df.astype({dep: 'category'})
    return dep, conts, cats


dep, conts, cats = cat_columns(df)
dep, conts, cats
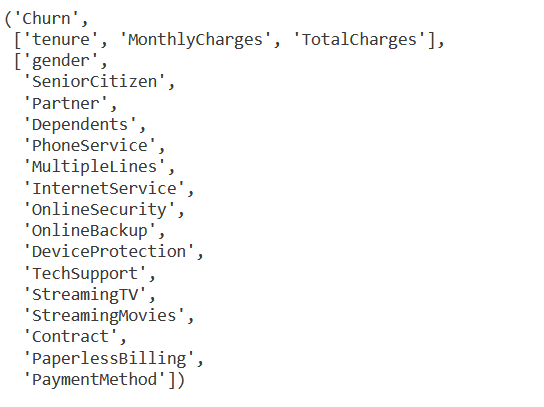
Next we split our dataframe into training and validation
from numpy import random
from sklearn.model_selection import train_test_split

random.seed(42)
trn_df,val_df = train_test_split(df, test_size=0.25)
Now we prepare our training and validation data - splitting our dependent column (Churn) from the independent columns (categorical and continuous)
def xs_y(df):
    xs = df[cats+conts].copy()
    return xs,df[dep] if dep in df else None

trn_xs,trn_y = xs_y(trn_df)
val_xs,val_y = xs_y(val_df)
Next we replace our categorical fields and our dependent variable (Churn) with their associated codes
trn_xs[cats] = trn_xs[cats].apply(lambda x: x.cat.codes)
val_xs[cats] = val_xs[cats].apply(lambda x: x.cat.codes)
trn_y = trn_y.astype('category').cat.codes
val_y = val_y.astype('category').cat.codes
And take a quick peek at our training dataset
trn_xs.head()

Just for some fun, let’s first try to create a small Decision Tree classifier and see how it does in predicting Churn
from sklearn.metrics import mean_absolute_error
from sklearn.tree import DecisionTreeClassifier

m = DecisionTreeClassifier(max_leaf_nodes=4).fit(trn_xs, trn_y);
mean_absolute_error(val_y, m.predict(val_xs))

In my test, I see it getting an absolute error of 0.22487. We can increase the size of the tree to get a better result. In the next cell we’re allowing our tree to grow until the leaf nodes have no less than 50 rows (samples) in them.
m = DecisionTreeClassifier(min_samples_leaf=50)
m.fit(trn_xs, trn_y)
mean_absolute_error(val_y, m.predict(val_xs))

With this change, I’m now seeing an absolute error of 0.19931. Now lets try with a Random Forest to see if adding more Decision Trees and taking the average will help our predictions.
from sklearn.ensemble import RandomForestClassifier

rf = RandomForestClassifier(100, min_samples_leaf=5)
rf.fit(trn_xs, trn_y);
mean_absolute_error(val_y, rf.predict(val_xs))

Now our error is 0.19761. Lets see if a larger forest will further improve our results
rf = RandomForestClassifier(1000, min_samples_leaf=5)
rf.fit(trn_xs, trn_y);
mean_absolute_error(val_y, rf.predict(val_xs))

Error is now down to 0.19591. Let’s log this model and save it to MLFlow
mlflow.sklearn.autolog()

with mlflow.start_run():
    rf = RandomForestClassifier(1000, min_samples_leaf=5)
    rf.fit(trn_xs, trn_y);
    mlflow.log_param("criterion", rf.criterion)
    mean_absolute_error(val_y, rf.predict(val_xs))
After running all the above cells, you should see something like this as the output of the final cell:

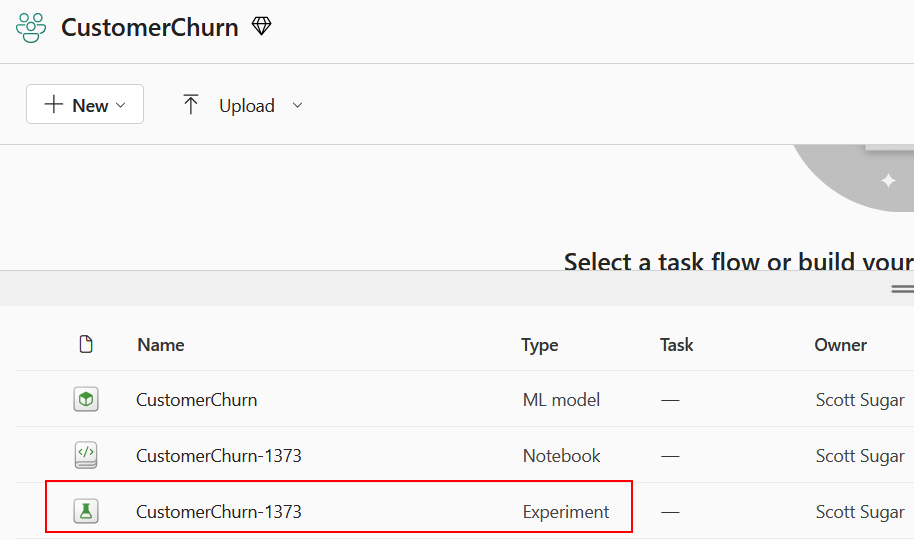
You should also see a new Experiment in your workspace (you may need to refresh your browser window):
Save your ML Model
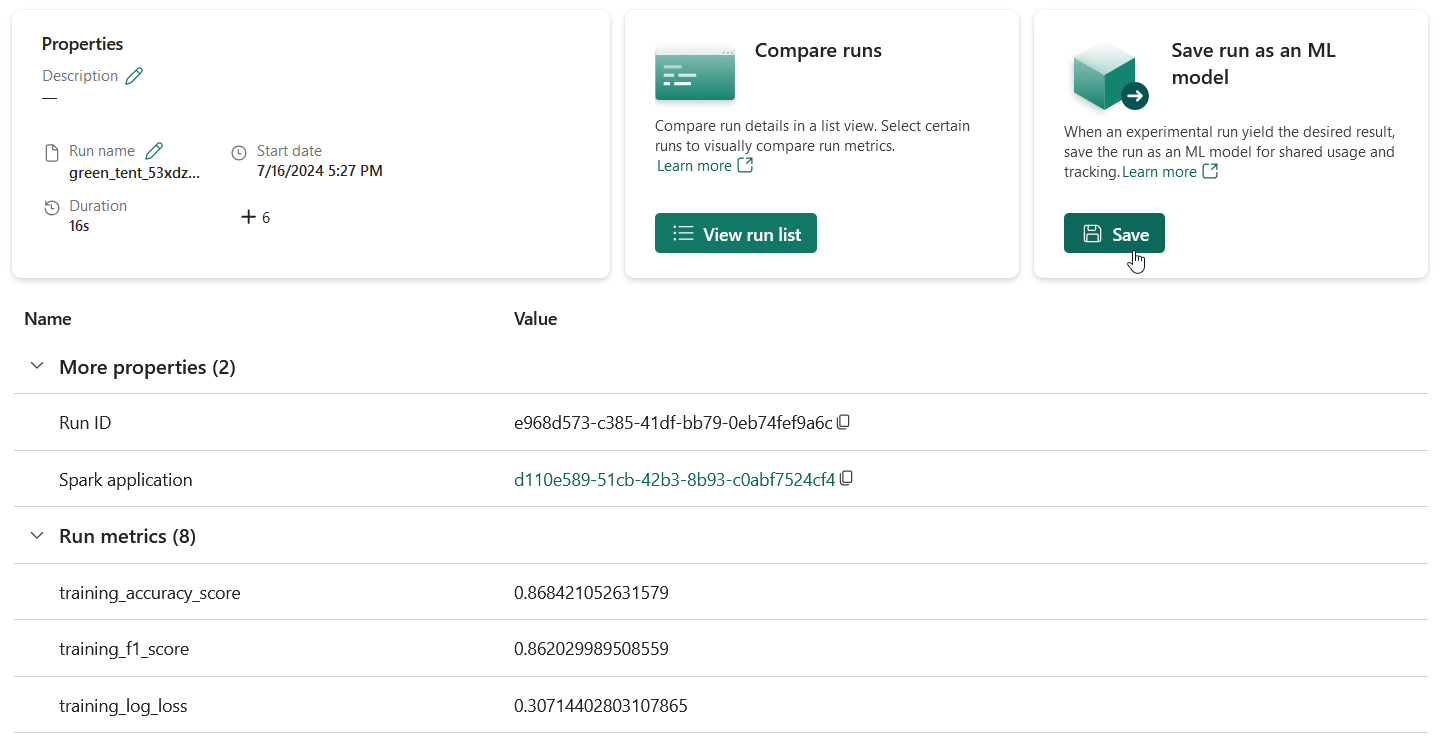
Open the new experiment that’s been created in your workspace. Click on Save run as ML model
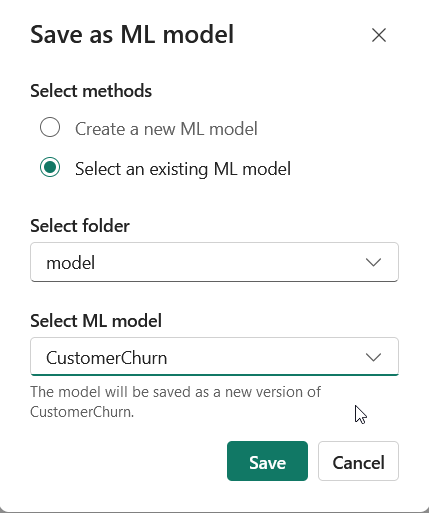
Click on “Select an existing ML model”, select the model folder, select the model you created and click Save.
Load and Predict
Create a new notebook in your workspace. Add the following code to your notebook.
Install required modules
%pip install -U -q datasets scikit-learn
Next we’re going to load the data again (usually you would have separate data for testing or to make predictions on) and prep it in the same way we did before (change datatypes, change categorical variables to their codes) with the exception of not removing the customerID field this time. Then we’ll use the validation set to make predictions with.
import mlflow.sklearn
from datasets import load_dataset
from numpy import random
from sklearn.model_selection import train_test_split
import pandas as pd

churn = load_dataset('scikit-learn/churn-prediction')
df = churn['train'].to_pandas()
df['TotalCharges'] = df.tenure * df.MonthlyCharges
df = df.astype({'SeniorCitizen': 'object'})
df = df.astype({'TotalCharges': 'float'})

def cat_columns(df):
    dep = 'Churn'
    cats = [col for col in df.columns if col not in df.describe().columns]
    conts = [col for col in df.columns if col not in df[cats]]
    cats.remove(dep)
    #cats.remove('customerID')
    df[cats] = df[cats].apply(lambda x: pd.Categorical(x))
    df = df.astype({dep: 'category'})
    return dep, conts, cats

dep, conts, cats = cat_columns(df)

random.seed(42)
trn_df,val_df = train_test_split(df, test_size=0.25)

def xs_y(df):
    xs = df[cats+conts].copy()
    return xs,df[dep] if dep in df else None

test_xs,test_y = xs_y(val_df)

test_xs[cats] = test_xs[cats].apply(lambda x: x.cat.codes)
test_y = test_y.astype('category').cat.codes
Now we convert the pandas dataframe to a spark dataframe, load our ML model, and generate our predictions.
import pyspark
from pyspark.sql import SparkSession
from synapse.ml.predict import MLFlowTransformer

model = MLFlowTransformer(
    inputCols=["gender","SeniorCitizen","Partner","Dependents","PhoneService","MultipleLines","InternetService","OnlineSecurity","OnlineBackup","DeviceProtection","TechSupport","StreamingTV","StreamingMovies","Contract","PaperlessBilling","PaymentMethod","tenure","MonthlyCharges","TotalCharges"], # Your input columns here
    outputCol="Churn", # Your new column name here
    modelName="CustomerChurn", # Your model name here
    modelVersion=2 # Your model version here
)

spark = SparkSession.builder.appName('pandasToSparkDF').getOrCreate()
df = spark.createDataFrame(test_xs)

df = model.transform(df)

display(df)
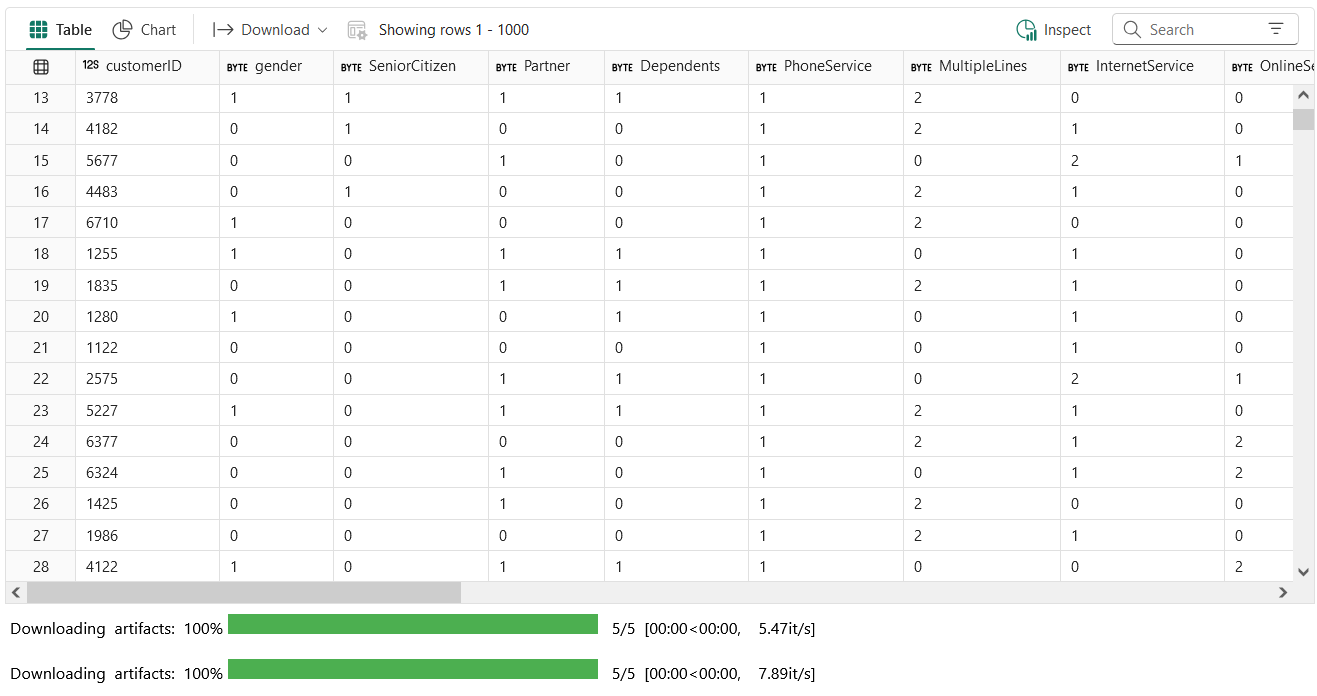
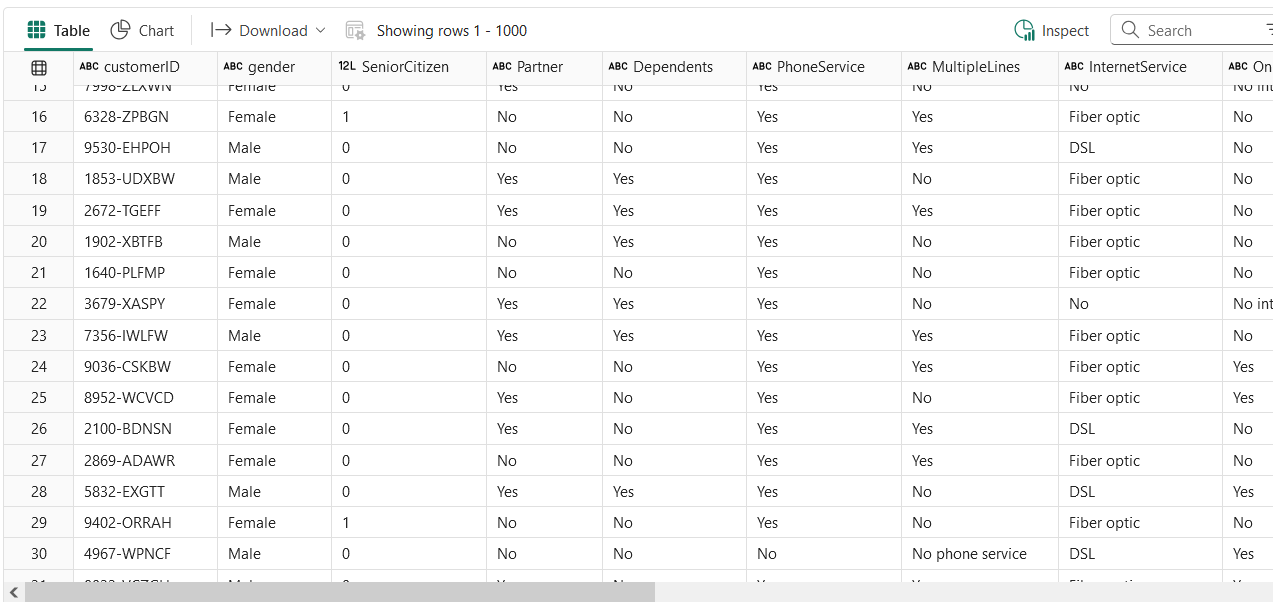
If we want, we can flip our categorical columns back to their categories (e.g. PhoneService = [‘Yes’, ‘No’])
pd_df = df.toPandas()

pd_df[cats] = pd_df[cats].apply(lambda col: col.map(dict(enumerate(val_df[col.name].cat.categories))))

display(pd_df)
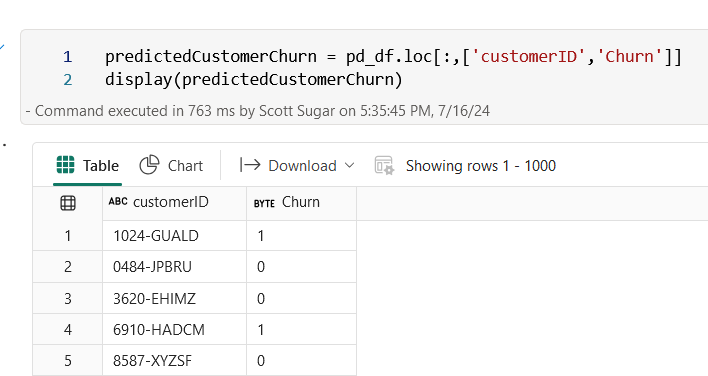
And we can then display just the customerID, and our prediction on whether they will churn or not
predictedCustomerChurn = pd_df.loc[:,['customerID','Churn']]
display(predictedCustomerChurn)
Result from the notebook should look like this:
Conclusion
As we wrap up this walkthrough on predicting customer churn using scikit-learn’s Random Forest Classifier on Microsoft Fabric, we hope you’ve gained valuable insights to apply to your data analytics projects. Remember, the key to successful churn prediction lies in understanding your data, fine-tuning your model, and continuously learning from the outcomes. With the steps outlined in this blog, you’re well-equipped to tackle customer churn and drive impactful business decisions.