In this article, we’re exploring the world of Natural Language Processing (NLP) through the lens of sentiment analysis, utilizing the powerful HuggingFace Transformers library within the Microsoft Fabric environment. This guide will walk you through the steps to harness the capabilities of HuggingFace Transformers to analyze and interpret the sentiment of textual data, providing valuable insights into customer feedback, market trends, and more.
Inspiration for this article and many of the details on how to get this working are derived from the amazing Practical Deep Learning for Coders course, HuggingFace’s Getting Started with Sentiment Analysis, and mlflow’s Fine-Tuning Open-Source LLM using QLoRA with MLflow and PEFT. My contributions here are how to get all this working in Fabric.
![]() As Fabric notebooks do not yet have GPUs available - as of the time of this article in mid 2024 - fine-tuning ML models like this can be a very slow process. Either you let this process run for a long time in Fabric (potentially hours or days), or you perform your model training on a Virtual Machine with GPUs, or in Databricks with GPUs and then import your model to Fabric for predictions. Hopefully GPU capabilities will come to Fabric soon
As Fabric notebooks do not yet have GPUs available - as of the time of this article in mid 2024 - fine-tuning ML models like this can be a very slow process. Either you let this process run for a long time in Fabric (potentially hours or days), or you perform your model training on a Virtual Machine with GPUs, or in Databricks with GPUs and then import your model to Fabric for predictions. Hopefully GPU capabilities will come to Fabric soon ![]()
Create an ML Model
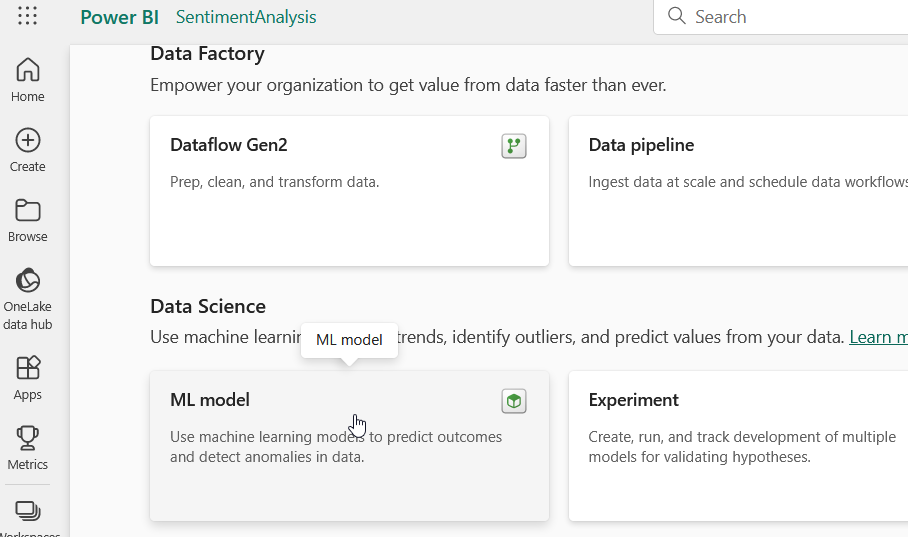
To start with, create a new ML model in the Data Science section of Microsoft Fabric

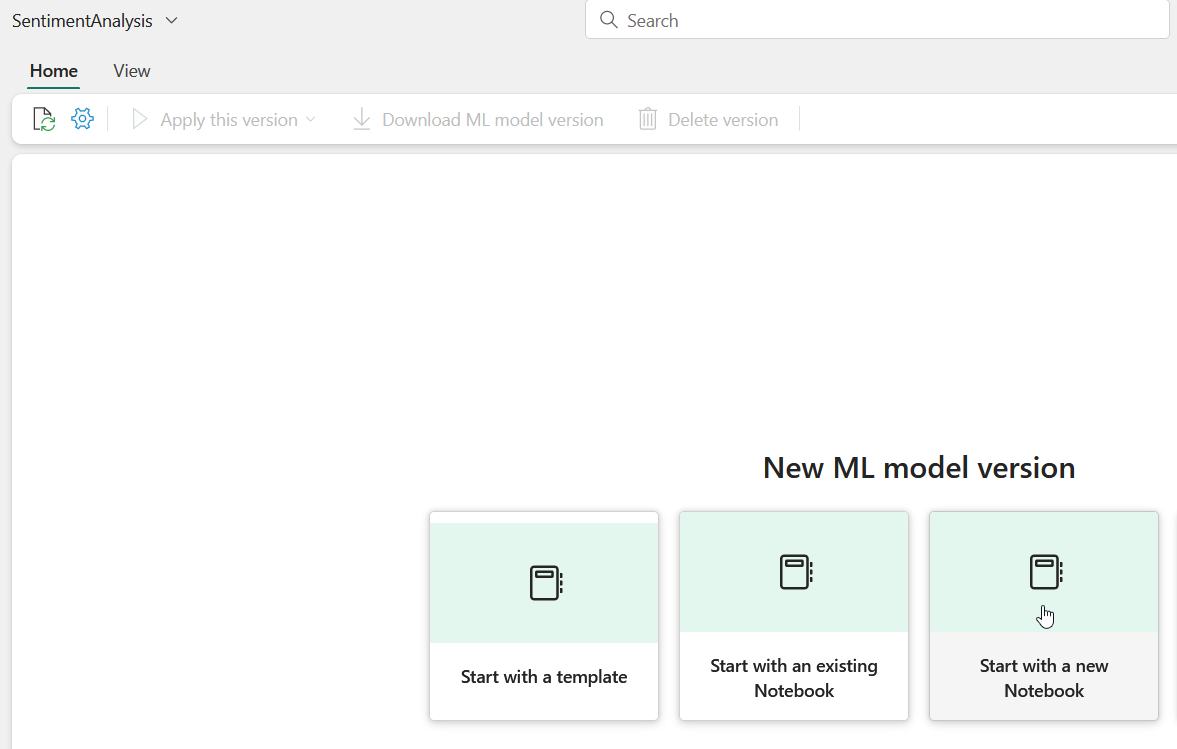
You’ll be asked to name your model, as we’ll be performing Sentiment Analysis, I’ve creatively named mine SentimentAnalysis
Next, click on “Start with a new Notebook”

Train your model
The following commands will download the IMDB sentiment analysis dataset, create small training and testing datasets, train a model, generate a pipeline from that model and save it with mlflow. Add these to your new Notebook. Each section can be it’s own cell in your notebook.
Install requirements
%pip install -U -q torch torchvision -f https://download.pytorch.org/whl/torch_stable.html
%pip install -U -q accelerate
%pip install -U -q sentence-transformers
%pip install -U -q sentencepiece
%pip install -U -q datasets
%pip install -U -q evaluate
%pip install -U -q transformers
%pip install -U -q mlflow
Download the IMDB dataset and create small training and testing datasets. Note the range(####) sections. Those can be increased (better accuracy) or decreased (faster run) as desired. The 3000/300 split in the cell below takes around 2.5 hours to run in Fabric.
from datasets import load_dataset

imdb = load_dataset("imdb")
small_train_dataset = imdb["train"].shuffle(seed=42).select([i for i in list(range(3000))])
small_test_dataset = imdb["test"].shuffle(seed=42).select([i for i in list(range(300))])
#print a row of the small training dataset
small_train_dataset[1]
Specify the base model you’d like to use and create your tokenizer function.
from transformers import AutoTokenizer

model_nm = 'microsoft/deberta-v3-small'
tokz = AutoTokenizer.from_pretrained(model_nm)
Tokenize your training and testing datasets
def tok_func(x): return tokz(x["text"])
train_tok_ds = small_train_dataset.map(tok_func, batched=True)
test_tok_ds = small_test_dataset.map(tok_func, batched=True)
As per HuggingFace documentation, the following will “speed up training… use a data_collator to convert your training samples to PyTorch tensors and concatenate them with the correct amount of padding”
from transformers import DataCollatorWithPadding

data_collator = DataCollatorWithPadding(tokenizer=tokz)
Prepare our model for training.
from transformers import AutoModelForSequenceClassification

id2label = {0: "negative", 1: "positive"}
label2id = {"negative": 0, "positive": 1}
model = AutoModelForSequenceClassification.from_pretrained(model_nm, num_labels=2, label2id=label2id, id2label=id2label)
Define the metrics to be used to evaluate how good our model is after fine-tuning accuracy and f1 score
import numpy as np
import evaluate as ev

load_accuracy = ev.load("accuracy")
load_f1 = ev.load("f1")
def compute_metrics(eval_pred):
   logits, labels = eval_pred
   predictions = np.argmax(logits, axis=-1)
   accuracy = load_accuracy.compute(predictions=predictions, references=labels)["accuracy"]
   f1 = load_f1.compute(predictions=predictions, references=labels)["f1"]
   return {"accuracy": accuracy, "f1": f1}
Configure our training arguments. Take note that we’ll be reporting our results and logs to mlflow via the report_to parameter
from transformers import TrainingArguments

bs = 16
epochs = 2
lr = 2e-5
args = TrainingArguments(output_dir='outputs', learning_rate=lr, warmup_ratio=0.1,
    eval_strategy="epoch", per_device_train_batch_size=bs, per_device_eval_batch_size=bs,
    num_train_epochs=epochs, weight_decay=0.01, report_to='mlflow')
Run our first pass at training our model
from transformers import Trainer
import mlflow

trainer = Trainer(model, args, train_dataset=train_tok_ds, eval_dataset=test_tok_ds,
              tokenizer=tokz, data_collator=data_collator, compute_metrics=compute_metrics)

with mlflow.start_run() as run:
    trainer.train()
Create a pipeline from our trained model, this consolidates our model and our tokenizer to make it easier to perform sentiment analysis with our model.
from transformers import pipeline

tuned_pipeline = pipeline(
    task="text-classification",
    model=trainer.model,
    batch_size=8,
    tokenizer=tokz
)
#run a quick check of our pipeline to ensure it works.
quick_check = "I love this movie"
tuned_pipeline(quick_check)
Generate a signature (what should the inputs and outputs look like) for our consolidated model (model and tokenizer) and log it to mlflow for use in other notebooks.
from mlflow.models import infer_signature
from mlflow.transformers import generate_signature_output

model_config = {"batch_size": 8}

output = generate_signature_output(tuned_pipeline, quick_check)
signature = infer_signature(quick_check, output, params=model_config)

with mlflow.start_run(run_id=run.info.run_id):
    model_info = mlflow.transformers.log_model(
        transformers_model=tuned_pipeline,
        artifact_path="fine_tuned",
        signature=signature,
        input_example="I love this movie!",
        model_config=model_config,
    )

mlflow.end_run()
After running all the above cells, you should see something like this as the output of the final cell:

You should also see a new Experiment in your workspace (you may need to refresh your browser window):

Save your ML Model
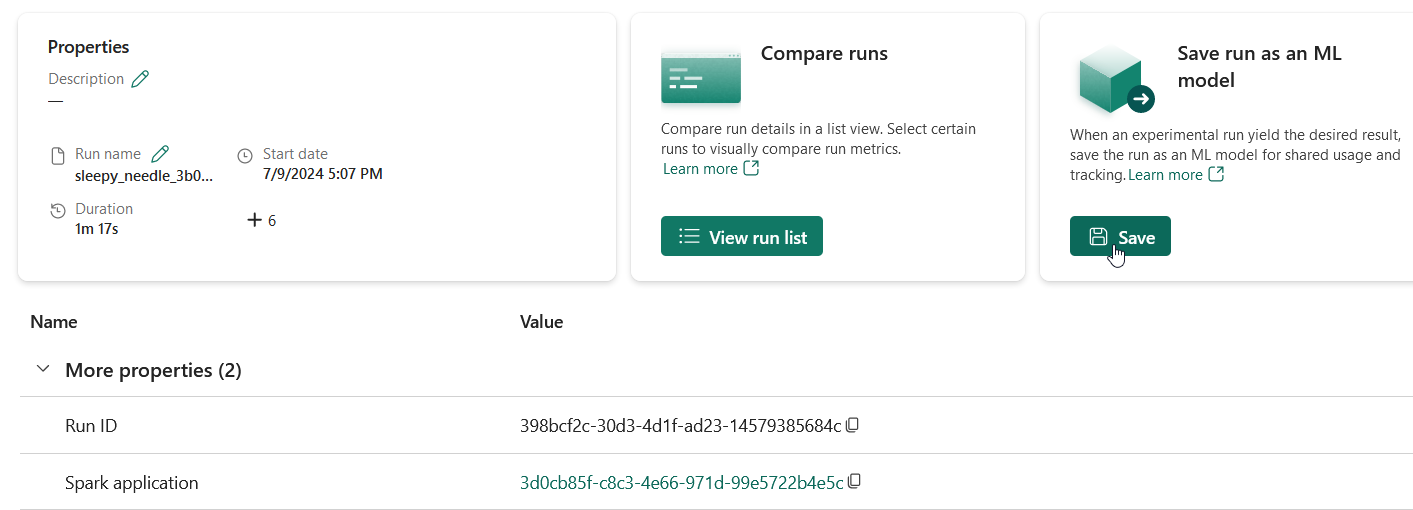
Open the new experiment that’s been created in your workspace. Click on Save run as ML model

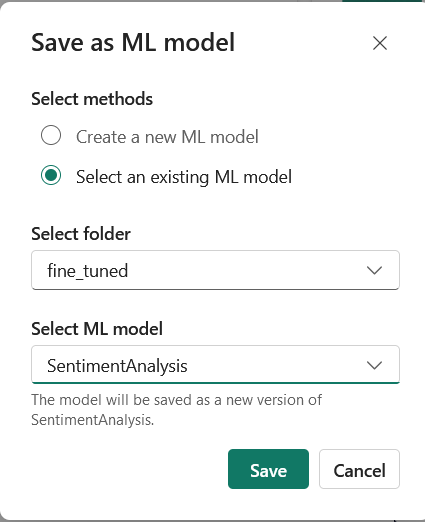
Click on “Select an existing ML model”, select the fine_tuned folder, select the model you created and click Save.

Load and Predict
Create a new notebook in your workspace. Add the following code to your notebook.
Install required modules
%pip install -U -q transformers
%pip install -U -q mlflow
Load the latest version of the SentimentAnalysis ML model
import mlflow

loaded = mlflow.transformers.load_model(model_uri=f"models:/SentimentAnalysis/latest")
Feed some new reviews into our model
new_reviews = ["This movie was the best, I loved it.", "this movie was the worst, boring!"]
loaded(new_reviews)
Result from the notebook should look like this:

Conclusion
In conclusion, the integration of HuggingFace Transformers with Microsoft Fabric and MLFlow for NLP Sentiment Analysis allows developers and data scientists to build more accurate, efficient, and scalable sentiment analysis models. The HuggingFace library provides a vast collection of pre-trained models that can be fine-tuned to specific datasets, while Microsoft Fabric ensures a robust and secure infrastructure for deploying these models. MLFlow, on the other hand, offers a streamlined workflow for experiment tracking, model management, and deployment.
As we have seen, the combination of these technologies enables practitioners to not only develop cutting-edge sentiment analysis solutions but also to manage the entire machine learning lifecycle with ease.
Remember, the key to successful sentiment analysis lies in the quality of the data, the choice of model, and the infrastructure that supports it. With HuggingFace Transformers, Microsoft Fabric, and MLFlow, you are well-equipped to tackle the challenges of NLP (in this case sentiment analysis) and extract meaningful insights from textual data. Embrace these tools, experiment with confidence, and let your data tell its story.